Are you aiming to sell in 60563 this spring but unsure how to hit peak buyer demand? You are not alone. With winter weather, contractor schedules, and school calendars to juggle, timing your launch can feel tricky. This guide gives you a clear 60- and 120-day plan, plus practical tips for photos, staging, pricing, and go-live strategy tailored to District 204. Let’s dive in.
Why spring timing matters in 60563
Spring is the primary demand season in Chicagoland. Buyer search and showings typically build from late winter into March through June. If you align your listing with this window, you increase your odds of more showings and stronger offers.
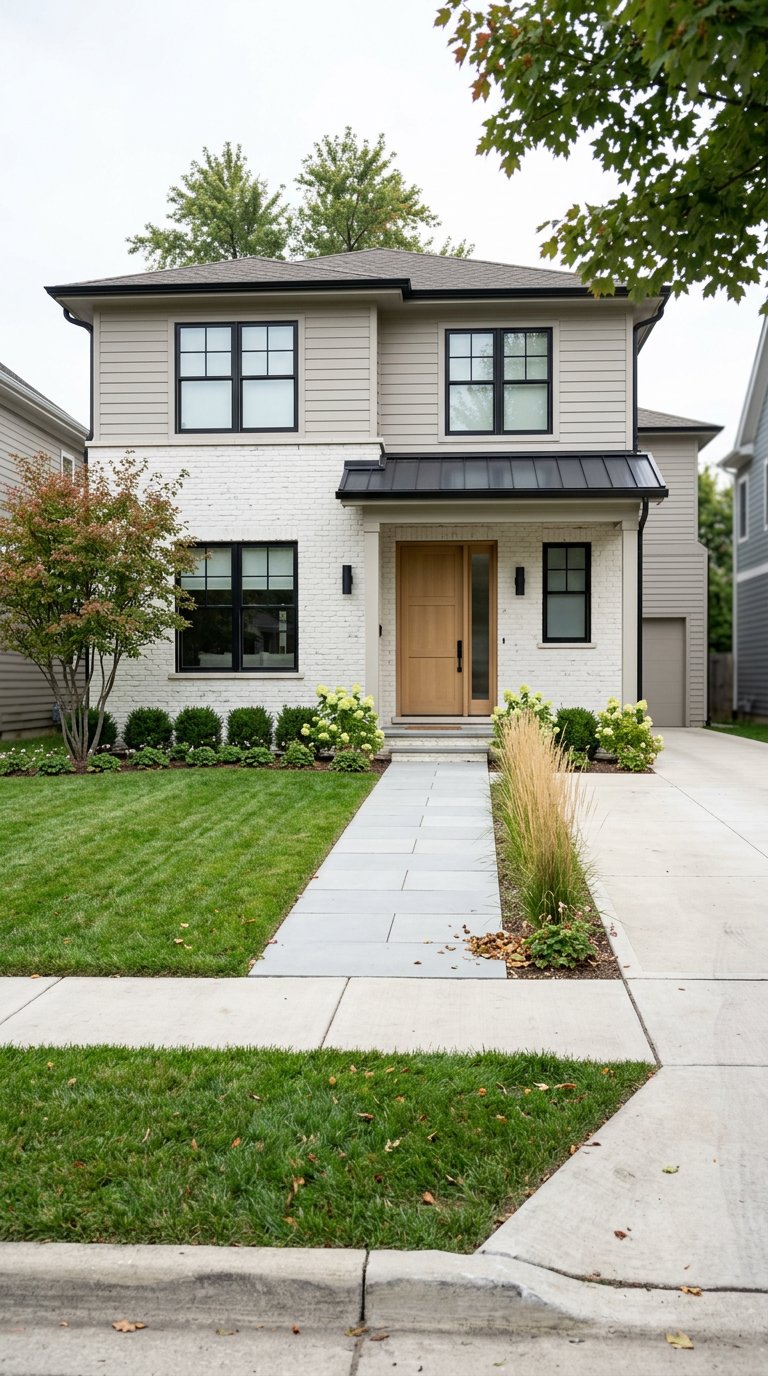
In the Midwest, curb appeal improves quickly in early spring. Fresh greenery and tidy planting beds help your photos and first impressions. Plan exterior prep so your home looks its best when buyers are most active.
District 204 timing and buyer interest
Many buyers consider proximity to public schools when shopping. In the Naperville area, District 204 is often an amenity that draws attention from families who prefer to move on a school-year schedule. That concentrates demand in spring as buyers aim to close and settle before summer ends.
Keep language and marketing neutral and factual when referencing schools. Use official sources for boundaries and calendars and avoid any statements that could be interpreted as steering.
Pick your target go-live week
The first 10 to 14 days after listing are critical. A common strategy is to list mid-week and build momentum into the first weekend.
- Aim to go live Wednesday or Thursday in your target week.
- Keep showings flexible the first two weeks, including evenings.
- Coordinate all marketing so it hits at once for maximum visibility.
Your 60-day plan (fast-track to spring)
Use this if you want a thorough prep in roughly two months.
Week 0: Decide and set the plan
- Select your listing agent and align on a mid-week target launch.
- Review recent comparable sales and current inventory to set expectations.
- Start an intensive declutter and deep clean.
Week 1: Inspect and tackle urgent issues
- Consider a pre-list inspection to surface repairs early.
- Service HVAC, water heater, and other major systems.
- Begin high-impact fixes like roof leaks or electrical safety items.
Week 2: Plan finishes and staging
- Lock in painting, flooring repairs, and any minor kitchen or bath updates.
- Create a room-by-room staging plan with your agent.
- Continue decluttering and organize storage.
Week 3: Finish trades and refreshes
- Complete paint touchups, grout and caulk refresh, and hardware or lighting updates.
- Wrap contractor work and gather receipts and permits.
- Start staging key rooms and remove personal items.
Week 4: Final prep and pre-marketing
- Deep clean, including carpets and windows.
- Style for photos with neutral accents and fresh linens.
- Finalize disclosures and listing documents.
Week 5: Photography and listing setup
- Schedule professional photos and floor plans during daylight.
- Confirm showings protocol and weekend open-house plan.
- If using a Coming Soon period, confirm compliance with MLS rules.
Week 6: Go live and host showings
- Launch mid-week with full marketing.
- Offer a broker preview and a public open house over the weekend.
- Prepare for offers during the first one to two weeks.
Your 120-day plan (deeper prep, peak spring launch)
Use this if you are eyeing a March to May launch and want time for larger projects.
Month 4: Planning and paperwork
- Choose your agent and set a target month to list.
- Inventory belongings and plan a major declutter.
- Consider a pre-list inspection and start assembling records.
Month 3: Major projects and permits
- Complete larger work like roof replacement, waterproofing, or window upgrades.
- Pull permits where required and schedule inspections.
- Plan electrical or plumbing updates if needed.
Month 2: Finishes and curb appeal
- Repaint interiors and finish flooring repairs.
- Prepare landscaping for spring with pruning, mulch, and early bulbs.
- Confirm staging scope for key rooms.
Month 1: Staging and marketing prep
- Deep clean and install staging items.
- Book professional photos, floor plans, and a virtual tour within two weeks of go-live.
- Finalize disclosures and listing documents.
Final 2 weeks: Photos, pricing, and launch
- Complete photos 2 to 7 days before your listing date.
- Confirm pricing and the go-live schedule.
- Launch mid-week and host a weekend open house.
Winter fixes that pay off
Address projects that buyers and inspectors notice first. Doing these now reduces surprises and helps your home photograph well.
High-impact repairs to start early
- Roof, gutters, and downspouts issues.
- Foundation cracks or signs of water infiltration.
- HVAC and hot water service, along with electrical safety corrections.
These items can need lead time and directly affect buyer confidence and appraisals.
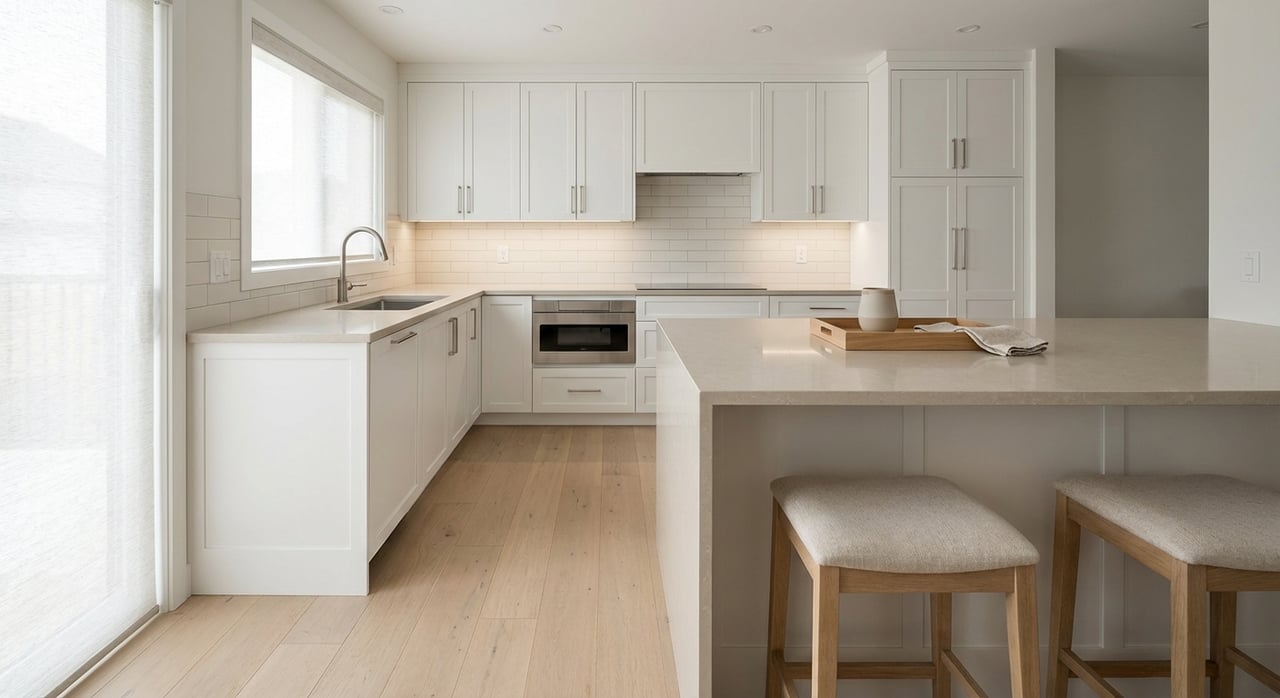
Smart, high-ROI updates
- Neutral interior paint in high-traffic areas.
- Flooring repairs, hardwood refinishing if practical, and grout refreshes.
- Kitchen and bath touchups such as cabinet hardware, caulk, and lighting.
These show well in photos and tend to reduce buyer objections.
Staging and curb appeal basics
- Declutter, depersonalize, and deep clean.
- In winter, keep paths clear, entries bright, and porches tidy.
- As spring arrives, refresh mulch, prune shrubs, and edge beds.
Consider a pre-list inspection
- Pros: identifies issues early, lets you fix proactively, and supports smoother negotiations.
- Timing: 30 to 45 days before listing is common.
- Best for older homes or if you suspect prior issues.
Permits and contractor scheduling
- Start permitted work early, since approvals and inspections can take weeks.
- Book trusted trades 4 to 8 weeks ahead of photos to avoid a last-minute rush.
Photography, staging, and launch strategy
Execute this sequence so everything looks cohesive on day one.
Photography timing and approach
- Schedule professional photos 2 to 7 days before your listing goes live.
- Capture exteriors when landscaping looks fresh. If it is early spring, plan a quick exterior reshoot once beds green up.
- Aim for the best natural light. Morning often favors east-facing exteriors and late afternoon favors west-facing.
Staging before photos
- Complete staging 48 to 72 hours before the shoot so photos match first showings.
- If budget is tight, stage key rooms: living area, main bedroom, and kitchen.
- Keep decor light and current. Use warm textures without heavy, dark accents.
“Coming Soon” done right
- Many sellers use a short Coming Soon window to build anticipation and tighten timelines.
- Confirm what marketing is allowed while in Coming Soon status and follow MLS rules.
- Use the time to finish touchups and schedule showings efficiently.
Go-live day and time
- Listing mid-week helps capture weekend traffic.
- Coordinate agent outreach and online marketing to hit at the same time.
- Stay flexible with showings in the first two weeks to maximize activity.
Pricing and showings playbook
- Use spring comparables and current inventory for the most relevant pricing read.
- In faster markets, strategic pricing can encourage multiple offers. In slower markets, adjust quickly based on feedback.
- Discuss offer deadlines, escalation clauses, and pre-qualification checks with your agent.
- Keep a show-ready kit with fresh towels, neutral scents, and quick-clean supplies.
Documents and disclosures to prepare
- Illinois seller disclosures and any required local forms.
- Receipts, warranties, and maintenance records for recent work.
- Permits and final inspections for permitted projects.
- Homeowners association documents, if applicable.
Quick prep checklist
- Choose target mid-week listing date to hit a strong weekend.
- 8 to 16 weeks out: schedule major repairs and permitted work.
- 4 to 8 weeks out: complete paint, flooring fixes, HVAC service, and start staging.
- 2 to 7 days out: professional photos and floor plans with staging in place.
- Listing day: go live mid-week, host weekend open house, and allow flexible showings for two weeks.
Getting your timing and prep right in 60563 can boost showings and improve outcomes, especially for buyers focused on District 204. If you want a design-forward, technically grounded plan tailored to your home, we are here to help. Connect with Sachs Design + Develop to Request a Free Consultation.
FAQs
When should District 204 sellers list to capture peak spring demand?
- Aim for a mid-week launch between March and May, then maximize the first two weekends of showings.
What winter repairs help my 60563 home sell faster in spring?
- Address roof or water issues, HVAC servicing, and electrical safety fixes before cosmetic updates.
How far before listing should I schedule professional photos?
- Plan photos 2 to 7 days before going live so images match current condition and staging.
Is a Coming Soon period useful for Naperville-area listings?
- It can build momentum and tighten scheduling; confirm and follow MLS rules to ensure compliance.
Should I get a pre-list inspection for an older home?
- Yes, it can surface issues early, guide repairs, and reduce renegotiations once under contract.